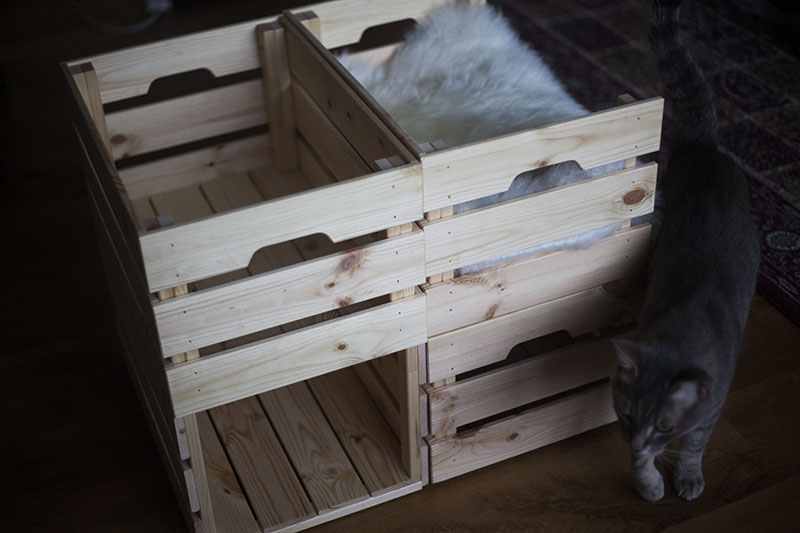
So let me start off by saying that I gave this DIY a shot before I took pictures for this post. I did this because I wanted to make sure the hack worked before I bothered to shoot any images – silly of me since it did work and pictures of the process would’ve been helpful, but if this is something you’re interested in making yourself, fear not! I’ll walk you through the process (it’s very easy), even though I don’t have many visuals to go along with those stages. Let’s start with some pictures of the final product first to see if you’ll want to make this for your own kitties (or even small pups!).
 Ikea Knagglig Large Sized Pine Wood Crates – Amazon
This hack uses the larger of the Ikea Knagglig boxes – this one here for reference. The size of each box is 9.75 inches (25 cm) high x 18 inches (46 cm) wide x 12.25 inches (31 cm) deep. The boxes are made of pine and look pretty durable, are extremely easy to put together with nothing but a screw driver, and you won’t need to use anything besides that same screw driver to do this hack.
The crates look very pretty stacked, which is why I decided to give them a shot as cat beds that are always on display. They fit nicely under desks and tables, and can easily be transformed into regular crates if kitty isn’t a fan of the final product.
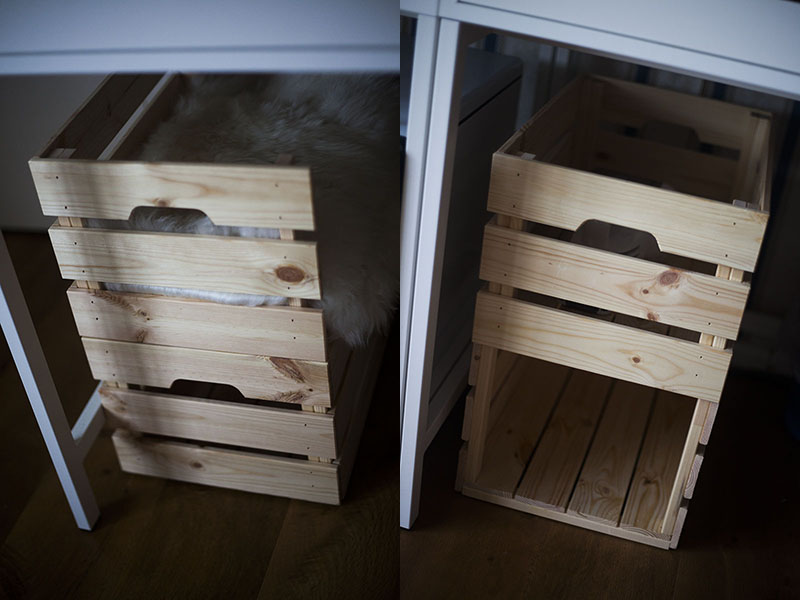
Now onto the details of how to make these. There are two versions of the cat bed DIY hack, in case you haven’t noticed by the pictures I’ve shown above. To make the condo, you just make one of each version and sit them next to each other. Each cat bed/hiding place DIY takes two Ikea Knagglig crates. You can’t do either version of the hacks just using a single crate, though I’ll get into why later.
I’ll start by showcasing the first version.

This is the side-entry version of the Ikea Knagglig DIY Cat Bed Hack. If you’re planning on putting something down for kitty to rest and sleep in, this is the version you should probably be using (as the other version of this hack will not leave much room for kitty to get in if you raise the base of the crate with a blanket).
Of course with the side-entry version, pretty much anything you add to the bottom of the crate will not be an issue. Here’s a sheepskin (which Avery loves to nap in), folded into thirds and laid down. Still plenty of room for kitty.

 Genuine Sheepskin as Kitty Bedding – Amazon / eBay
How do you make this version the hack? Here’s how it works.
First, you’ll need to make a complete Ikea Knagglig crate (assembly instructions can be found here) to put on the bottom. Be sure to stick some floor protectors onto the bottom of the completed crate if you have wood or laminate flooring, to prevent scratches.
Then to make the top portion of the cat bed, you’ll be making a partial/incomplete Ikea Knagglig crate.
How do you do it?
- Screw three sides together instead of four: using two of the short sides (with the embedded handles) and one of the long sides.
- Once you have this made, pop in the bottom of the box as you would’ve done when you put together the complete Knagglig crate you just made for the bottom.
- Instead of screwing all four long screws into the corners of the bottom, just use two of the long screws to secure the “back” of the cat bed, i.e. screw only where the short pieces connect to the long piece.
Now that you’re done the top portion of this DIY, carefully place it onto the complete Ikea Knagglig crate you made to go on the bottom.
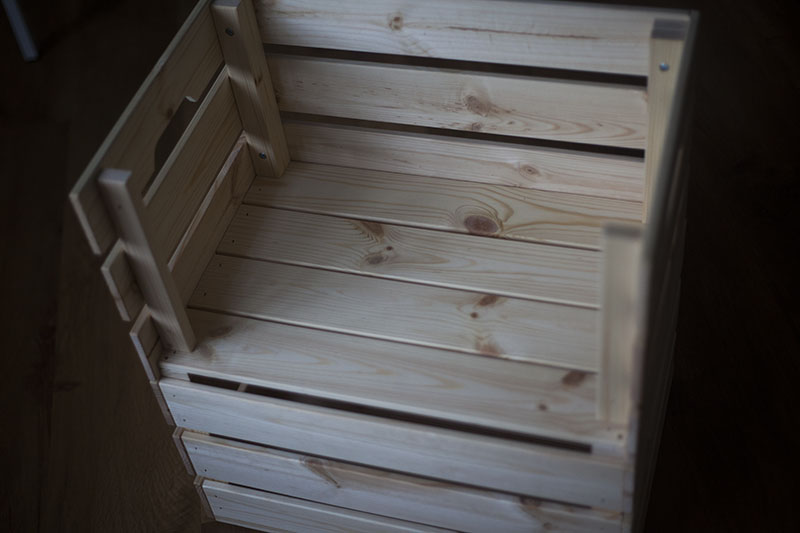
Add whatever you want to the inside of the top crate, and tuck the cat bed away wherever you want it – done!

When you stack the incomplete crate on top of the complete crate, the result looks like what you see in the picture below.
Remember how I was saying you can’t really do either version of this DIY without using two Ikea Knagglig crates? For this, side entry, version of the DIY, that’s because the incomplete top portion (where the cat bed is) is being supported by the strength of the complete bottom crate. If you take the top portion off and put it down for kitty on the floor, the base of the incomplete crate will not stay put and will fall to the floor, leading it to be uneven. So do make sure you grab two Knagglig crates to do this DIY.

Now onto the second version! The front-entry cat hiding spot version of this Ikea Knagglig hack.
Here’s how it looks (note for the curious: that’s a handheld vacuum cleaner we’ve got stored on the top portion of this hack):
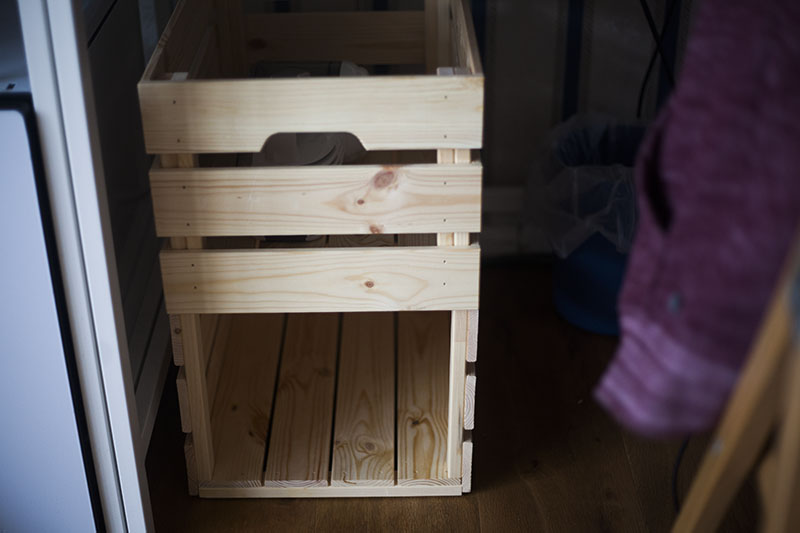
A closer look inside –

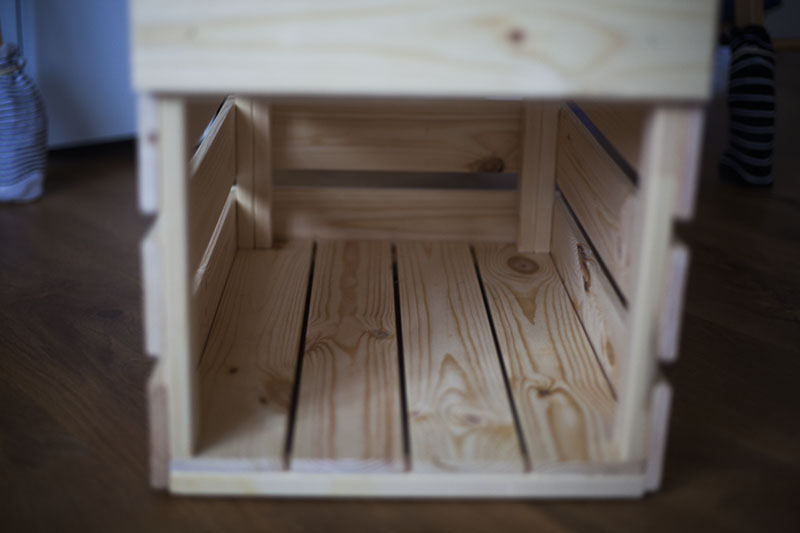
So how do you make this version of the hack?
It’s very similar to the first version. You’ll be making one complete Ikea Knagglig crate and one incomplete one.
First make the complete version of the crate. This version will be going on top, so you won’t need to add floor protectors to the bottom of it like in the other version.
Once you’ve made a complete crate, it’s time to make the bottom, incomplete front-entry crate for the DIY.
How do you do this?
- Screw three sides of the Knagglig crate together instead of four: this time using one of the short sides (with the embedded handle) and two of the long sides.
- Once this is done, pop in the bottom of the box as you would’ve done when you put together the complete Knagglig crate you just assembled for the top crate.
- Screw all four long screws into the corners of the bottom.
And finally, add some floor protectors to the bottom of the incomplete crate you just made if you’ve got laminate or wood flooring, place the complete box on top, and you’ve got your cat hiding place DIY made!

Why do you need two Knagglig boxes to make this version of the DIY? Well you technically don’t (it’s sturdy without the second box unlike the first DIY), but if you just make the bottom portion you’ll end up with something that looks like the picture below. Not bad, and yes, still usable by kitty, but not as nice as it is with a top portion to the hiding spot.

To show you a demonstration of why you won’t want to add any bedding to the bottom of this version of the DIY, let’s take a look at how Avery looks when he’s gone into the front-entry hiding spot.
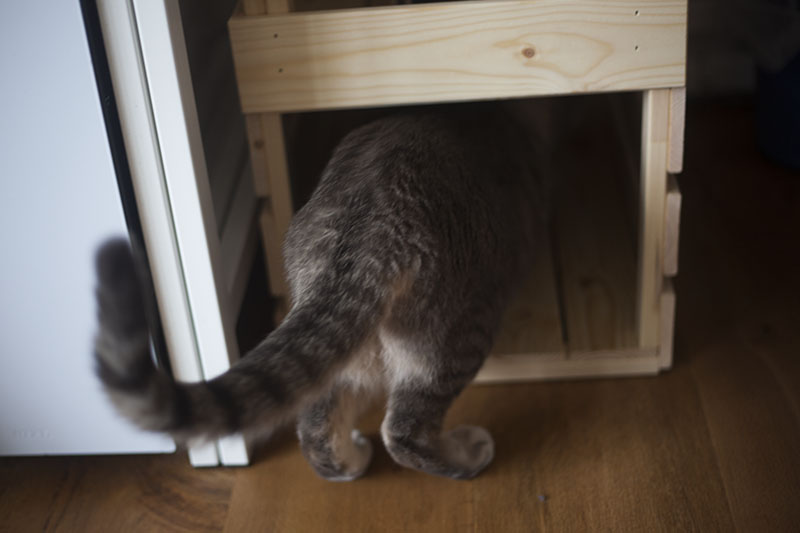
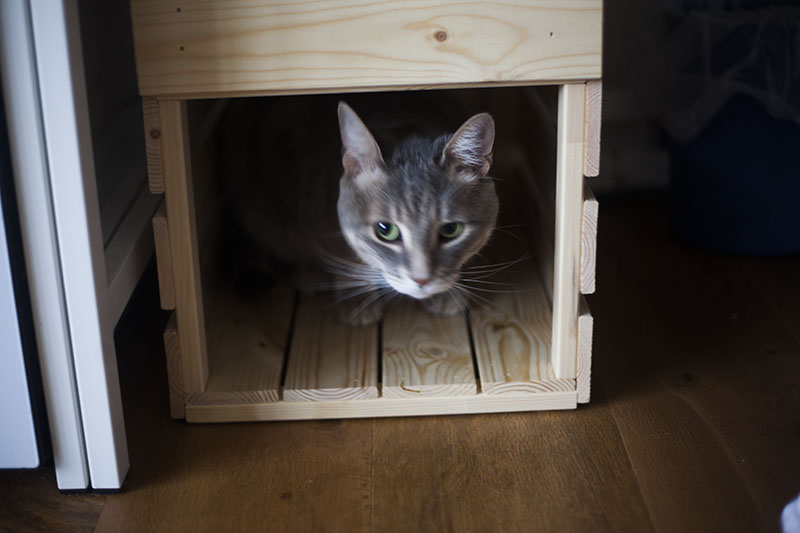
Not very much room above his head! Perfect size for kitties who love to be in tight spaces.
Know that Avery is very tall so this will definitely work if you’ve got a regular or even large sized cat – not sure about extra large cats, but definitely will work for the others.
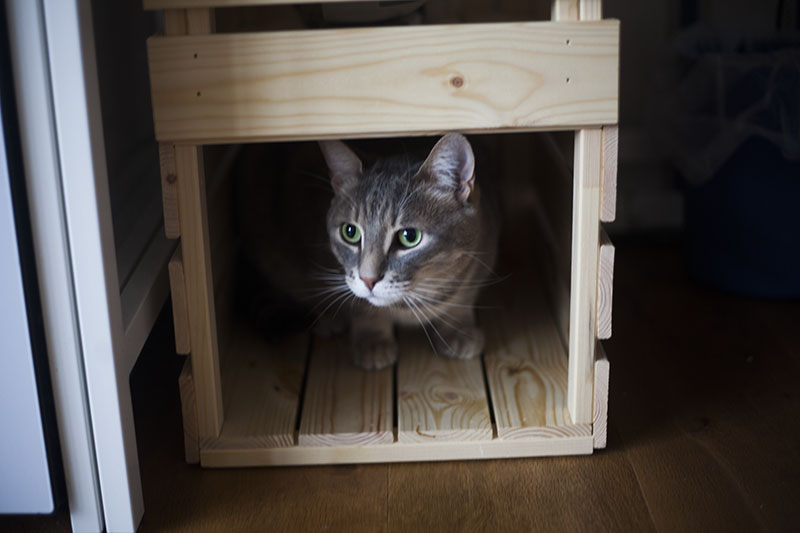
Stick it wherever you want and you’re all done. I love having Avery nap by us while we work, so under Thomas’ and my computer desks is where these boxes now lie.
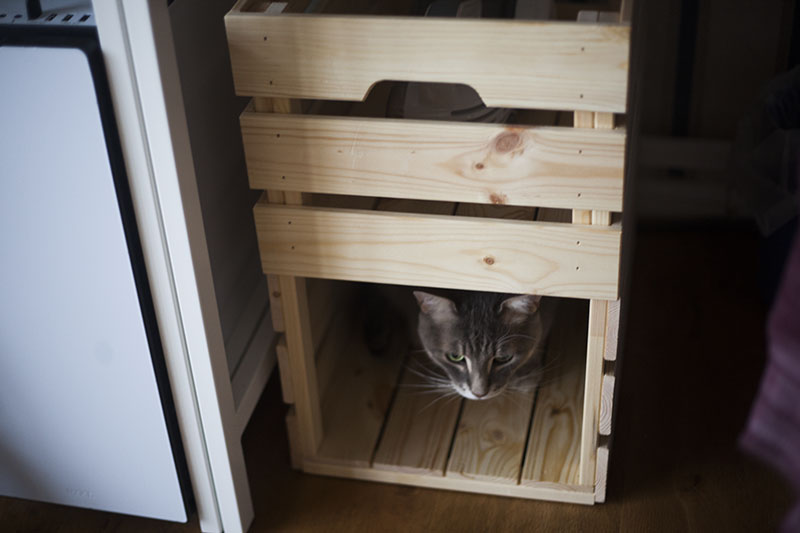
Yes, I have mine separate, but you can of course also push them together and leave them out in the open if that’s what you prefer! It makes for a lovely mini cat condo!

Plenty of room for multiple cats to sleep and hide in, too, if you decide to do both versions and push them together like this.
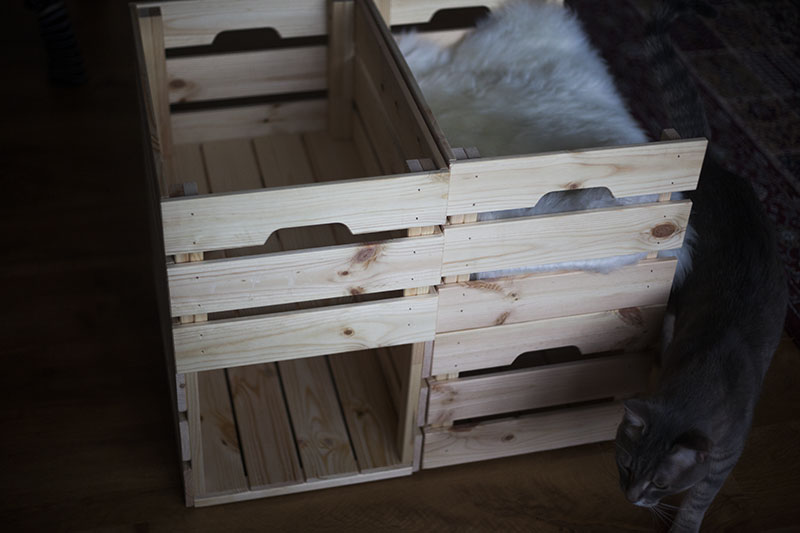
Because of the way this DIY has been done, you’ll be left with some extra screws and a remaining side from each of the incomplete Knagglig boxes. Keep these in case your cat doesn’t happen to like the cat beds/hiding places/condo you’ve made for him/her. That way, you can always turn the incomplete boxes into complete ones with the remaining pieces and use them for storage purposes. Just screw on the remaining bits.

Avery hasn’t taken to these cat beds yet, but I’ll give them some time since he usually needs a while to really warm up to some of the hiding spots I’ve made him in the past. How do I coax him into loving new nap spots? Usually with bribes (kibble used as snacks) to lure him in and then some while he’s staying inside. Also plenty of much-appreciated petting when he does take kitty naps in the hiding spots.

And, if it’s been months without him using them, I will just throw the extra pieces I have, transforming the incomplete crates into complete ones for storage. Very useful transformation for any cat beds left unloved!
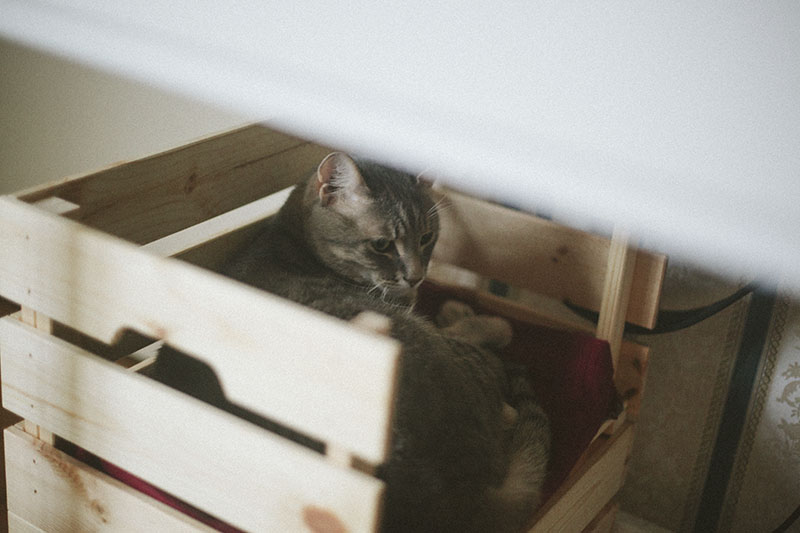
**Update 12/17/16: He now naps happily in the cat bed under my desk while I work –

Leave a Reply